Set up your payment methods
Set up the payment methods that you want to offer to your customers.
Before you begin
Step 1: Enable payment methods in the WooCommerce shop
To enable each payment method, sign in to your admin account, and go to WooCommerce > Settings > Payments. Set all payment methods you want to offer to your customers to enabled.
Step 2: Configure payment methods
- To enable each payment method, sign in to your admin account, and go to WooCommerce > Settings > Payments.
- Select Manage to change the configuration of each payment method
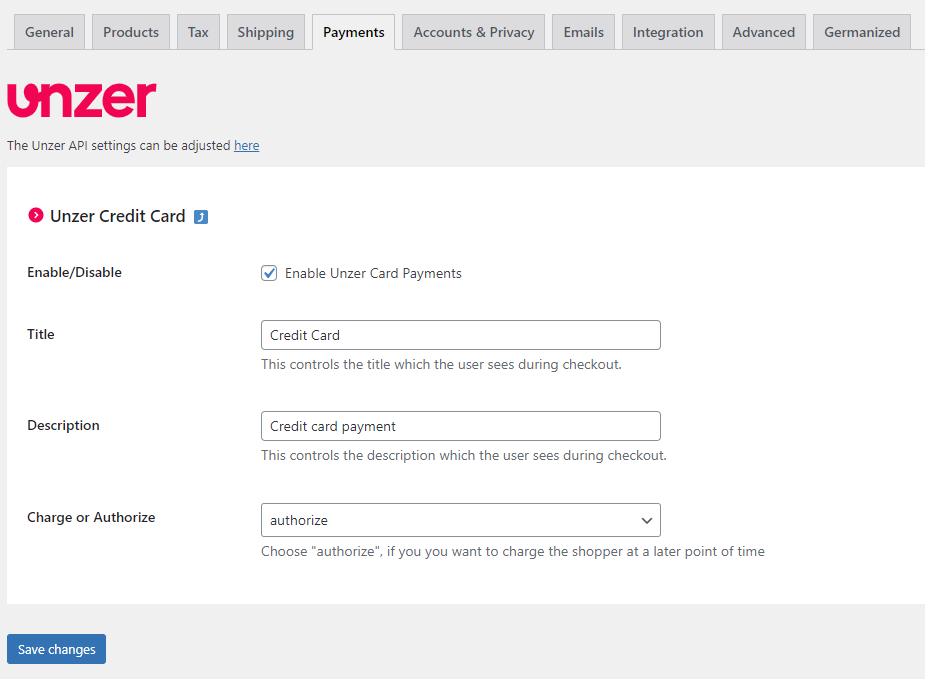
The image displays the configuration for payment method Credit card as an example. Other payment methods can have additional or fewer fields. The following table lists all possible configuration values for payment methods.
| Field name | Description |
|---|---|
| Enable/Disable | Select to enable the payment method |
| Title | Specify the title that should be displayed during checkout |
| Description | Specify the description for the payment method |
| Booking mode | Select Authorize if you want to charge at a later time Select Charge if you want to charge the customer directly |
| Save card | Registered customers can save their credit card on their WooCommerce customer accounts |
| Click to pay | With Click to pay customers can save their credit card information globally, more information |
Unzer Buy Now Pay Later
Unzer Buy Now Pay Later can use your main keypair that was saved when you installed the plugin, but if your setup with Unzer uses several Keypairs, then you must follow the guide below to save them.
If you are using one keyapir for all payment methods you will only have to pay attention to the Enable/Disable, Title and Description fields and leave Public Key and Private Key fields empty.
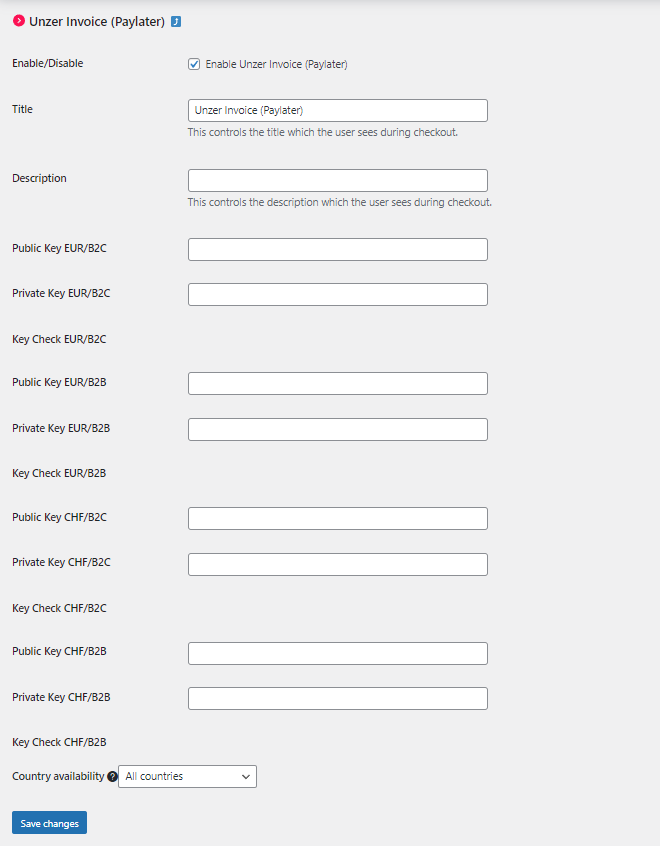
Set up Unzer Invoice payment method
- For the payment method Invoice, ensure that only end customers with an invoice address from Germany, Austria, or Switzerland can use the payment method.
- You require a unique key pair for each customer type and currency combination, for example a separate key pair for B2C (CHF) and a separate key pair for B2C (EUR).
- Currently only Euro (EUR) and Swiss Franc (CHF) currencies are supported.
- You can view the transactions in Unzer Insights.
- Make sure that the payment method is used for the minimum to maximum amounts contractually agreed with Unzer.
To set up the payment method:
- In the shop back end, go to Settings > Payments.
- Enable Invoice (Paylater).
- Update the key pair and then select Save changes.
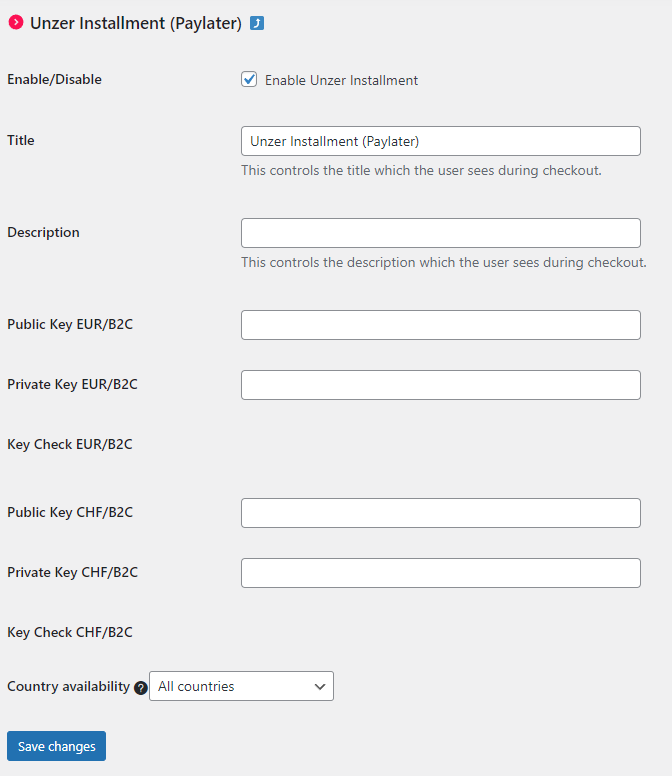
Set up Unzer Installment payment method
- For the payment method Installment, ensure that only end customers with an invoice address from Germany, Austria, or Switzerland can use the payment method.
- You require a unique key pair for each currency, for example a separate key pair for B2C (CHF) and a separate key pair for B2C (EUR).
- Currently, only B2C customer type is supported.
- Currently, only Euro (EUR) and Swiss Franc (CHF) currencies are supported.
- You can view the transactions in Unzer Insights.
- Make sure that the payment method is used for the minimum to maximum amounts contractually agreed with Unzer.
To set up the payment method:
- In the shop back end, go to Settings > Payments.
- Select Unzer Installment.
- Enable Unzer Installment.
- Enter the key pairs.
- Select Save changes.
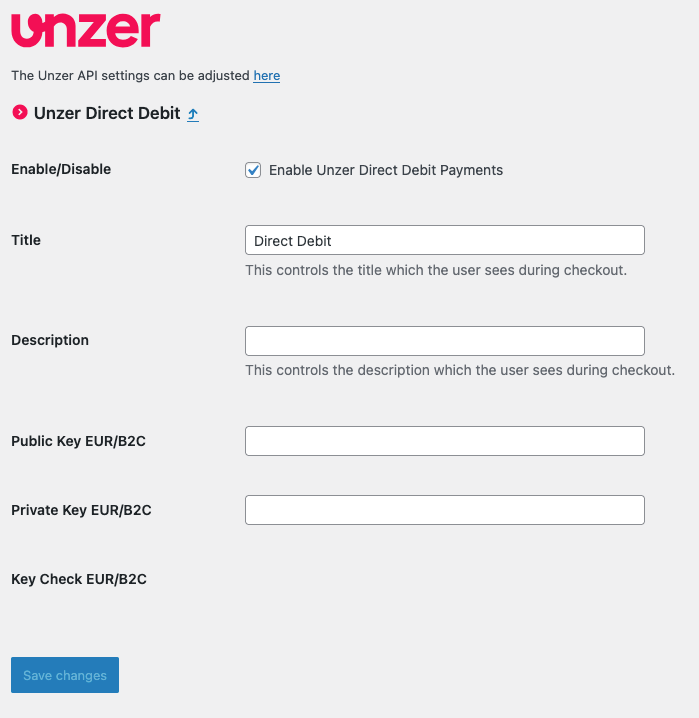
Set up Unzer Direct Debit payment method
Set up Unzer Direct Debit payment method- For Unzer Direct Debit, ensure that only end customers with an invoice address from Germany and Austria can use this payment method.
- You do not require a unique key pair for this payment method, for example, a separate key pair for each combination B2C (EUR).
- If no keys are saved for this payment method, the main key pair will be used.
- When you insert the Public Key, the field for Private Key will be visible.
- Only B2C customer type is supported.
- Only Euro (EUR) is supported.
- Ensure that the payment method can only be used for the minimum and maximum amounts contractually agreed with Unzer.
- You can view the transactions in Unzer Insights.
To set up the payment method:
- In the shop back end, go to Settings > Payments.
- Select Unzer Direct Debit.
- Enable Unzer Direct Debit.
- Enter the key pairs.
- Select Save changes.
Set up Google Pay payment method
Google pay has a more advanced setup you need to complete, before you can process payments.
- In the shop back end, go to Settings > Payments.
- Enable Google Pay and specify the details required for the payment method.
- See field details in the table below the screenshot. €. Select Save changes.

| Field name | Description |
|---|---|
| Enable/Disable | Select to enable the payment method |
| Title | Specify the title that should be displayed during checkout |
| Description | Specify the description for the payment method |
| Booking mode | Select Authorize if you want to charge at a later time Select Charge if you want to charge the customer directly |
| Gateway Merchant ID | The channel ID provided by Unzer and will automatically updated when you save your main keypair |
| Merchant ID | Provided by Google in the merchant info field |
| Merchant Name | Provided by Google in the merchant info field |
| Country Code | Country code of the acquirer. Use default value, unless Unzer informs you otherwise |
| Allow Credit Cards | Activate to accept credit cards with Google Pay |
| Allow Prepaid Cards | Activate to accept prepaid cards with Google Pay |
| Allowed Card Networks | Select if you wish to accept Mastercard, Visa or both card types |
| Button Color | Select button color or use Google’s default |
| Button Size Mode | Select size of the Google Pay pay button |
To learn more about the Google Pay integration, go to Google Pay: Overview.
You must also set up the gatewayMerchantId for Google Pay. Go to Google Pay integration for more details.