Install the plugin
Learn how to install and configure the plugin.
Before you begin
In addition to the system requirements specified by Shopware (see Shopware 6 system requirements), you require the following before you start installing the plugin:
- Go to Shopware requirements and select the relevant Shopware 6 version.
- Basic integration requirements from Unzer
- Shopware version 6.4.0 or later
- The bc-math PHP extension installed on your server. You can get bc-math extension from your server provider.
- Your php variable
serialize_precisionmust be set to value -1
Step 1: Install the plugin
There are two different ways to install Unzer plugin for Shopware 6.
Option 1: Install using Composer
To learn how to install Composer, go here.
- Install Shopware 6 plugin using the Composer.After the download process is complete, you can find the plugin in the \custom\plugins\UnzerPayment6 directory.
composer require unzerdev/shopware6 - Now sign in to your shop.
- For Shopware 6.4, go to Extensions > My extension.
The plugin is now available in the list.
Option 2: Install using GitHub
Download the latest version of our Shopware 6 plugin from GitHub.
Upload the unzipped files into the directory \custom\plugins on your server.
Run the following console command within the \custom\plugins\UnzerPayment6 directory to install the dependencies.
composer install --no-dev
Once the dependencies are installed, you can see the vendor folder.
Step 2: Install your plugin environment
Sign in with the admin user of your shop.
- For Shopware 6.6, go to Settings > Extensions.
Install and activate the plugin.
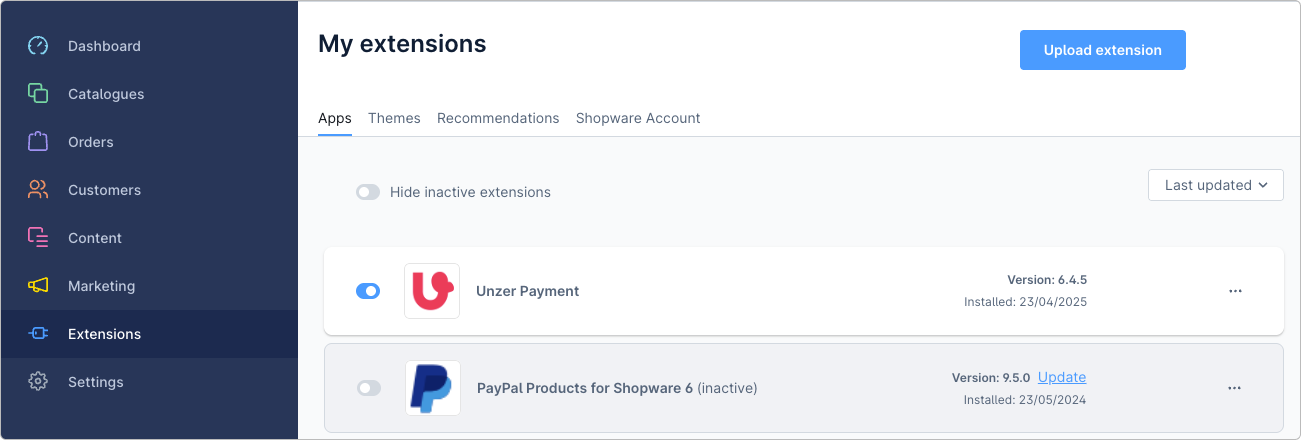
Select Unzer Payment.
Step 3: Configure your plugin environment (basic configuration)
To update the plugin configuration according to the sales channel and your requirements:
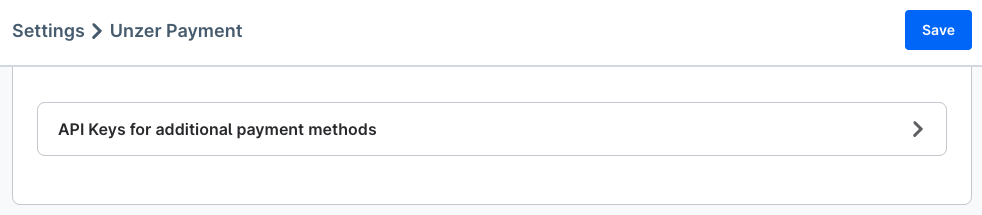
- For Shopware 6.6, go to Settings > Extensions > Unzer Payment.

In the settings window, configure the plugin according to your requirements.
| Field name | Description |
|---|---|
| Save | Use this button to save your settings. |
| Sales Channel | Select the sales channel for which the configuration should be applied.
|
| Public key | Enter your public key here. |
| Private key | Enter your private key here. |
| Show test data |
|
| Extended logging | Select this option if you want to log the API transactions to the Shopware log. The activation of this function is for analysis purposes. |
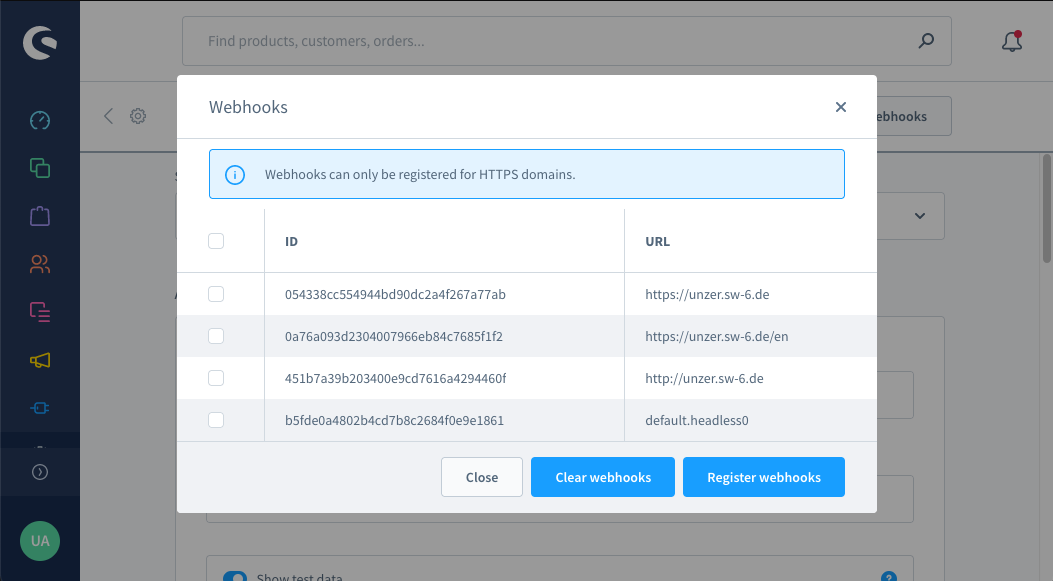
| Register webhooks | Use this button to register your webhooks for notifications. |
| Google Pay | For more details for setting up Google Pay. |
Step 4: Additional payment methods
To set up additional payment methods, click Additional payment methods to access the settings.

| Field name | Description |
|---|---|
| Invoice B2B EUR | For more details, go to setting up Invoice payment method. |
| Invoice B2B CHF | For more details, go to setting up Invoice payment method. |
| Invoice B2C EUR | For more details, go to setting up Invoice payment method. |
| Invoice B2C CHF | For more details, go to setting up Invoice payment method. |
| Installment B2C EUR | For more details, go to setting up Installment payment method. |
| Installment B2C CHF | For more details, go to setting up Installment payment method. |
| Direct Debit B2C EUR | For more details, go to setting up Direct Debit payment method. |
Step 5: Booking mode settings
Select the booking mode that you want to use, for each of the payment methods listed in this section.
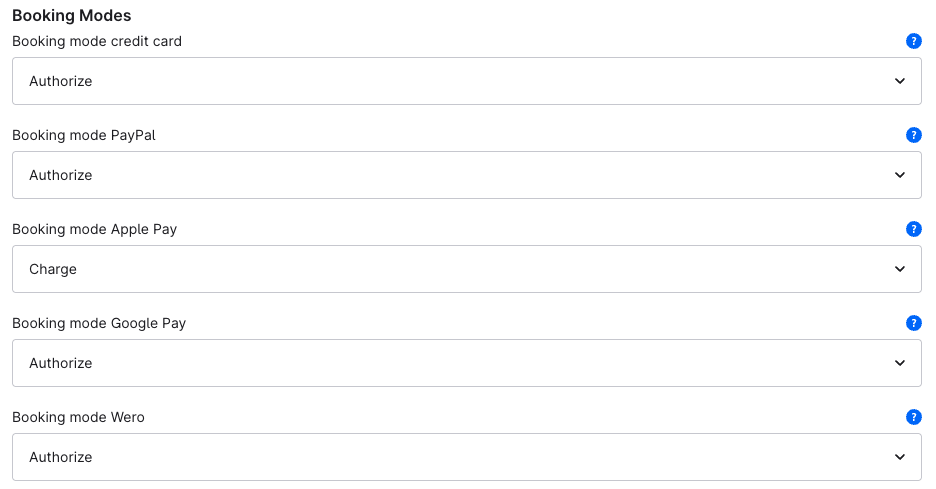
| Field name | Description |
|---|---|
| Booking mode Authorize | If you select the Authorize option, the amount must be collected later. Please refer to the section charge after authorization to learn how to charge after authorization. |
| Booking mode Charge | If you select the Charge option, the amount is debited immediately after the customer has placed the order in your shop. |
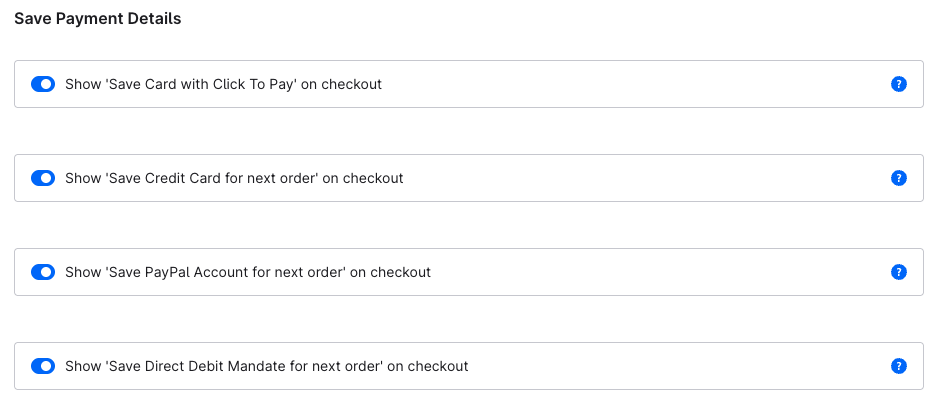
Step 6: Save payment details settings
Select if your customers can save payment details for next purchase.
For credit card you can also activate Click to pay.
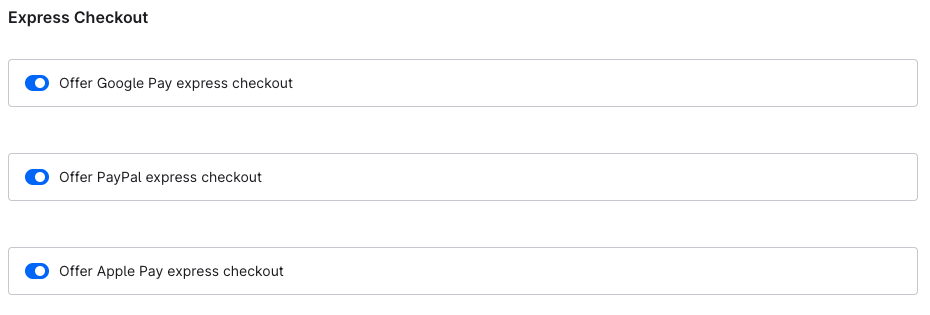
Step 7: Express Checkout settings
Select if you want to give your customers a faster checkout option with Express Checkout.
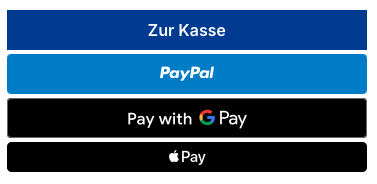
Express Checkout is available for Apple Pay, Google Pay and PayPal.
After you activate Express Checkout, you will see these three new options in your basket.
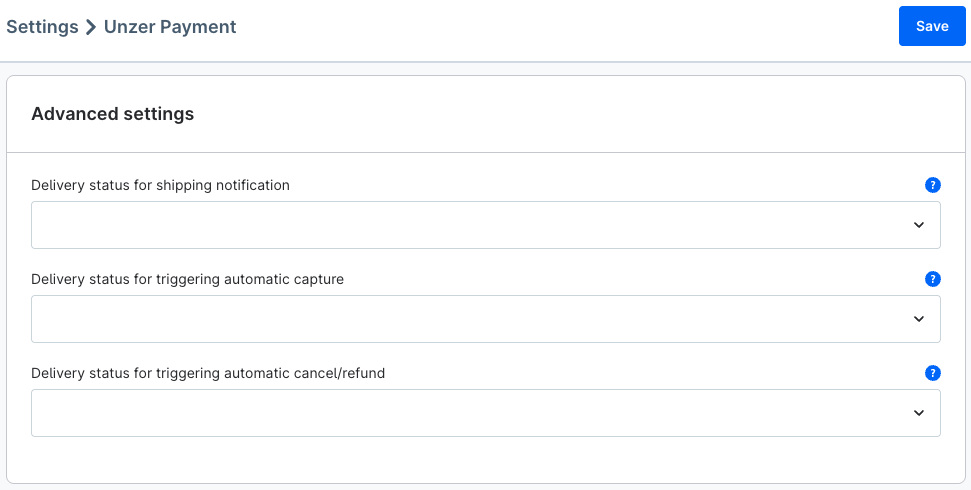
Step 8: Advanced settings
Select one of the various options for Delivery status for shipping notification, Delivery status for triggering automatic capture, and Delivery status for triggering automatic cancel/refund.
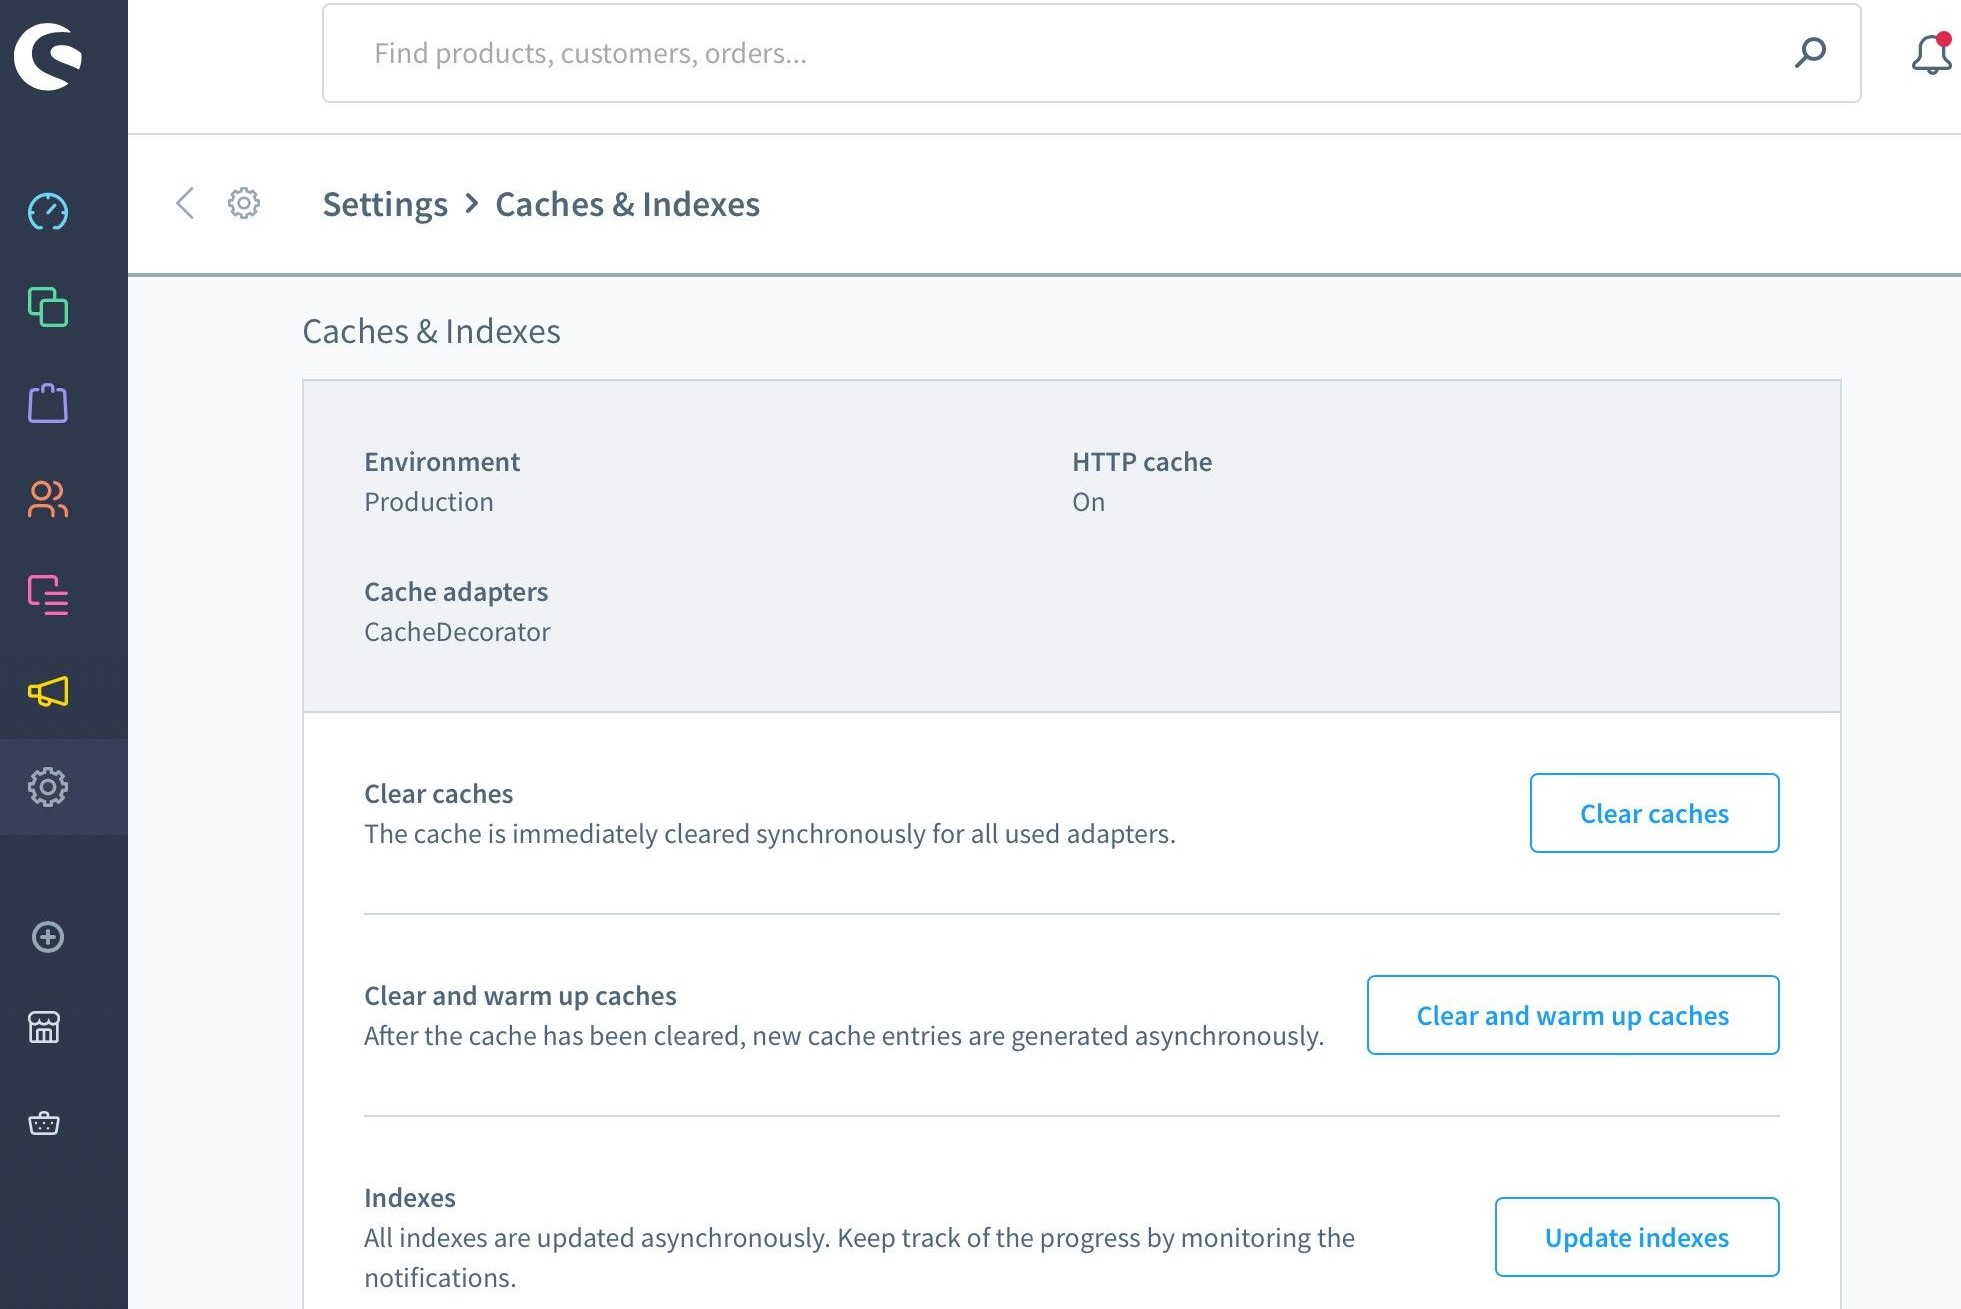
Step 9: Clear the caches
After completing the steps as described earlier, you must clear the cache for the configuration to take effect.
- Go to Settings > System > Caches & Indexes.
- Select Clear caches.
Step 10: Set up webhook notification
After the plugin is installed and configured, you can register your personal webhook notifications to your keypair and shop.
- Go to Settings > Plugins > Unzer Payment (Settings > Extensions, respectively).
- Select Register webhooks.
- In the pop-up window, select the URLs to register the notifications for them.
https:// at the beginning of your URL.(Optional) You can also delete existing webhooks by selecting the Clear webhooks button.