Install plugin
Learn how to install and configure the plugin.
Before you begin
Before installing the plugin, make sure that your shop meets the technical requirements as specified by OXID eShop 7 documentation.

Migrating from UI Component plugin
Before you install Unzer OXID 7 plugin, we recommend you read our guide.
Before you install Unzer OXID 7 plugin, we recommend you read our guide.
Third-party plugins
Note that third-party plugins and templates can affect the functionality of the Unzer plugin. We recommend that before using or updating them, and after each update, you check for any changes on your test system.
Note that third-party plugins and templates can affect the functionality of the Unzer plugin. We recommend that before using or updating them, and after each update, you check for any changes on your test system.
Step 1: Generate your API keys
Request test and live API key pairs for your Unzer merchant account.
Step 2: Install the plugin
Install the plugin from GitHub using Composer.
Run the following command from the shop root directory.
composer require unzerdev/oxid7Provide write access to /var/ directory during execution.
Step 3: Activate the plugin
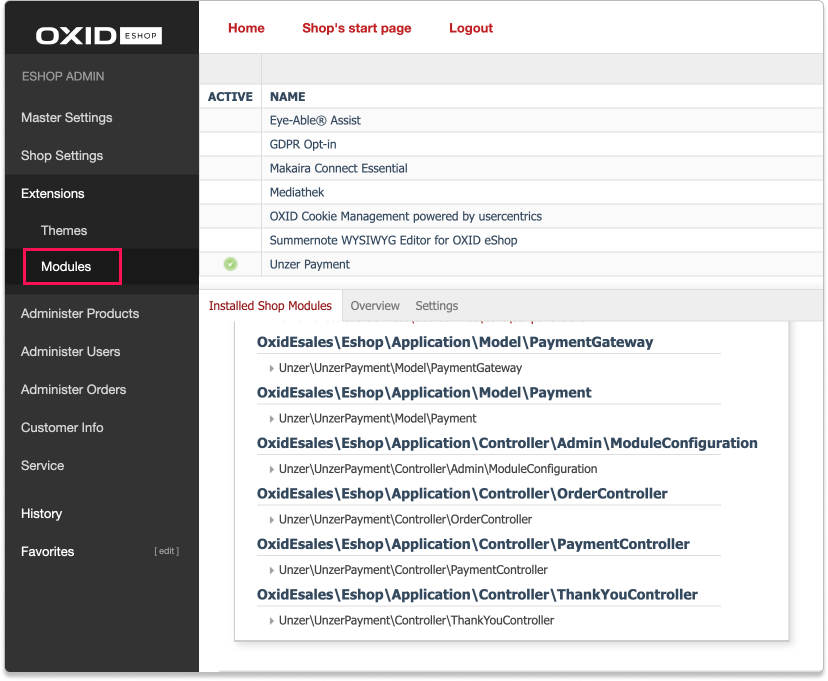
Go to Extensions > Modules.
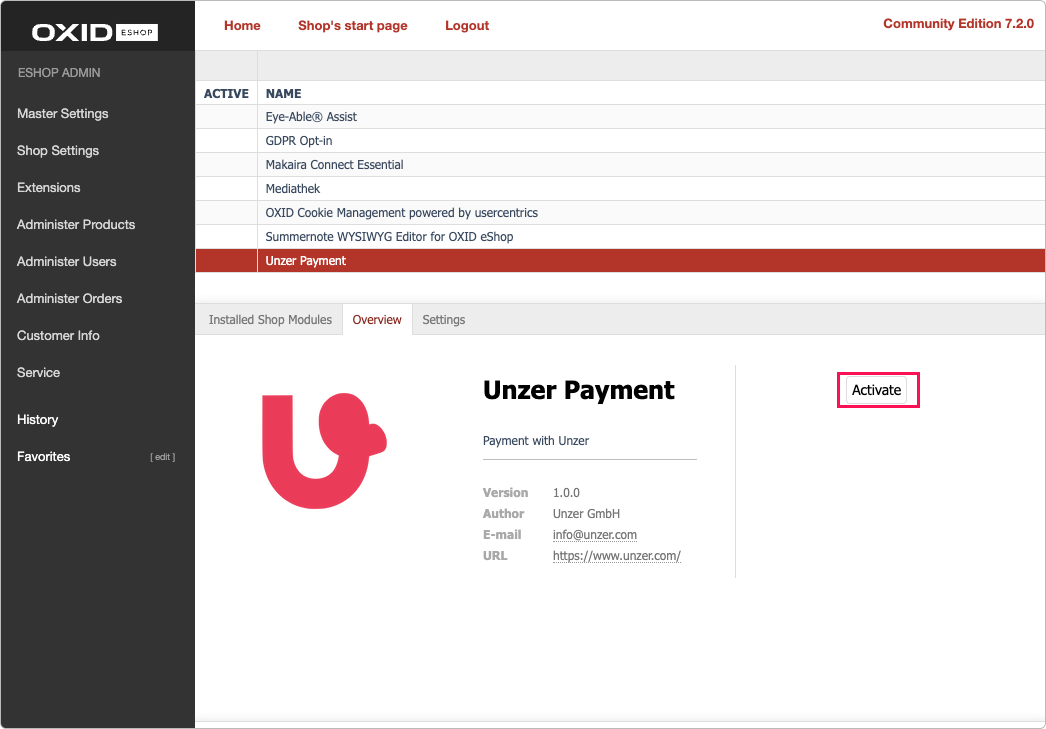
Select Unzer Payment > Overview > Activate.
Alternatively, you can also activate the plugin in command line/shell.vendor/bin/oe-console oe:module:activate unzer_paymentTo learn more, see OXID documentation.
Step 4: Configure the plugin
- In the shop backend, go to Extensions > Modules and select Unzer Payment.
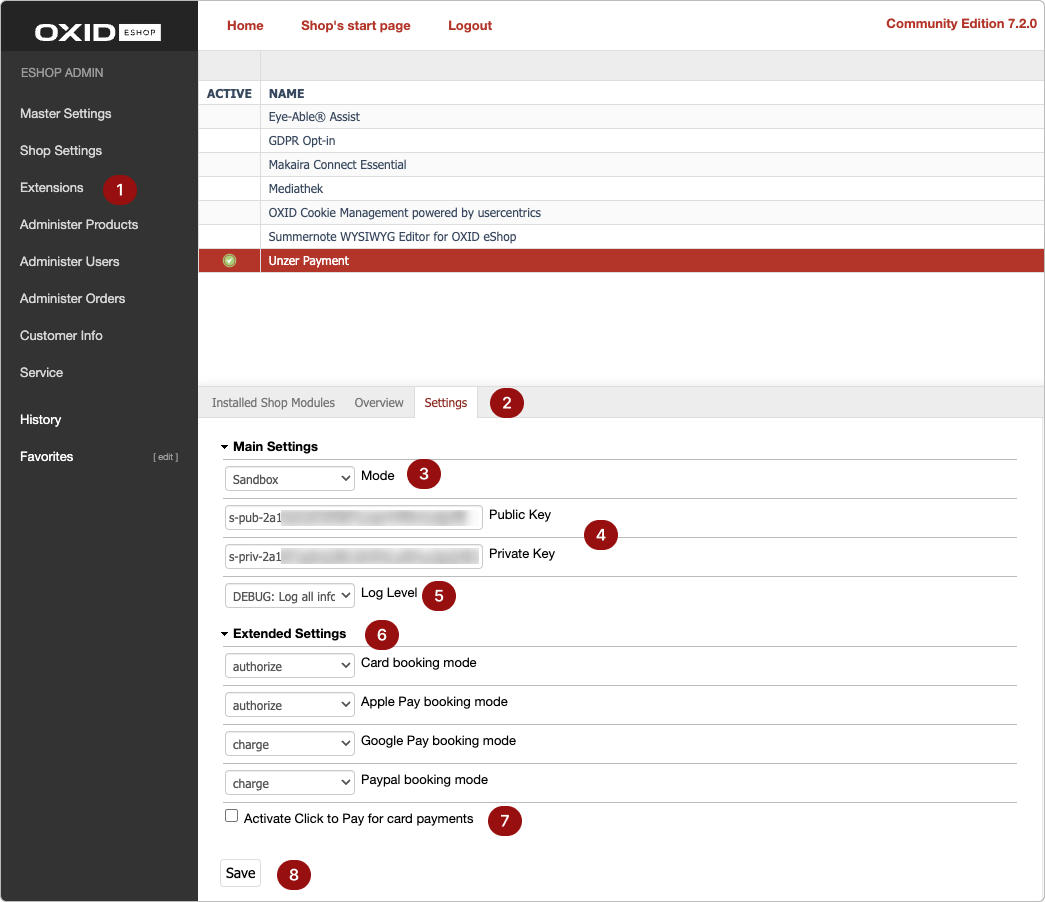
- Navigate to Settings > Main Settings.
- Select the Mode for the plugin.
- Specify the key pairs.
- Select the Log Level for your plugin.
- In the Extended Settings section, specify the booking mode for the payment methods that support both authorize and charge.You can only test the authorize booking mode in the sandbox environment. The charge booking mode is available in the production environment.
- (Optional) Select the checkbox for activating Click to Pay for card payments.
- Select Save.
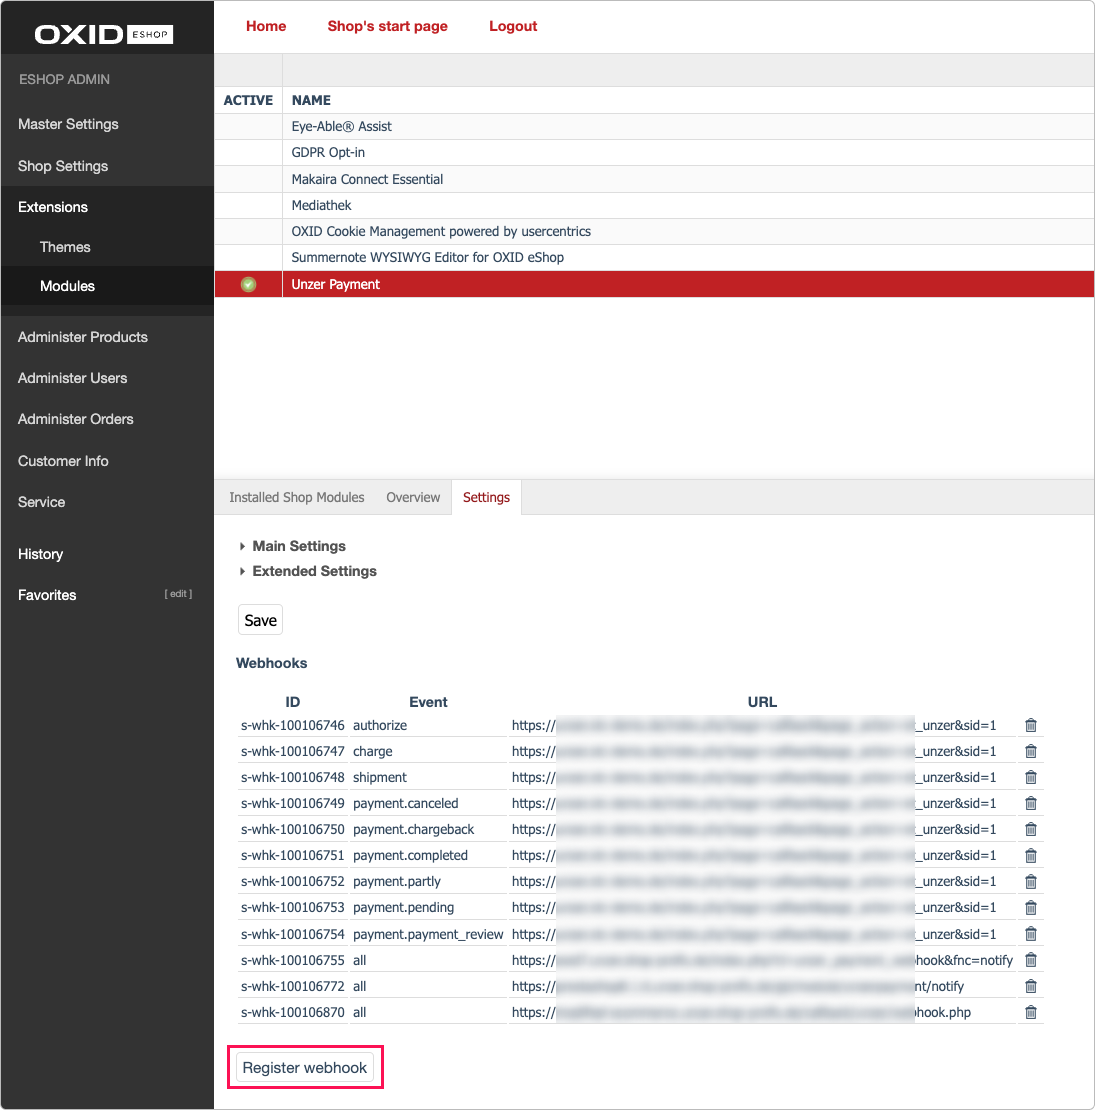
- In the Webhooks section, select Register webhook.
The webhooks are now available in the list as shown here: