Install the plugin
Learn how to install and configure the plugin.
Before you begin
Before installing the plugin, make sure that your shop meets the technical requirements as specified by nopCommerce
Note that third-party plugins and templates can affect the various functionalities of the Unzer plugin. So, before using or updating them and each update, check if there are any changes on the test system.
Step 1: Generate your API keys
Request test and live key pairs for your Unzer merchant account.
Step 2: Download the plugin from Unzer
Step 3: Install the plugin
- Log in with your admin credentials and go to Configuration > Local plugins, and select Upload plugin or theme. Optionally, you can also upload the plugin by FTP.
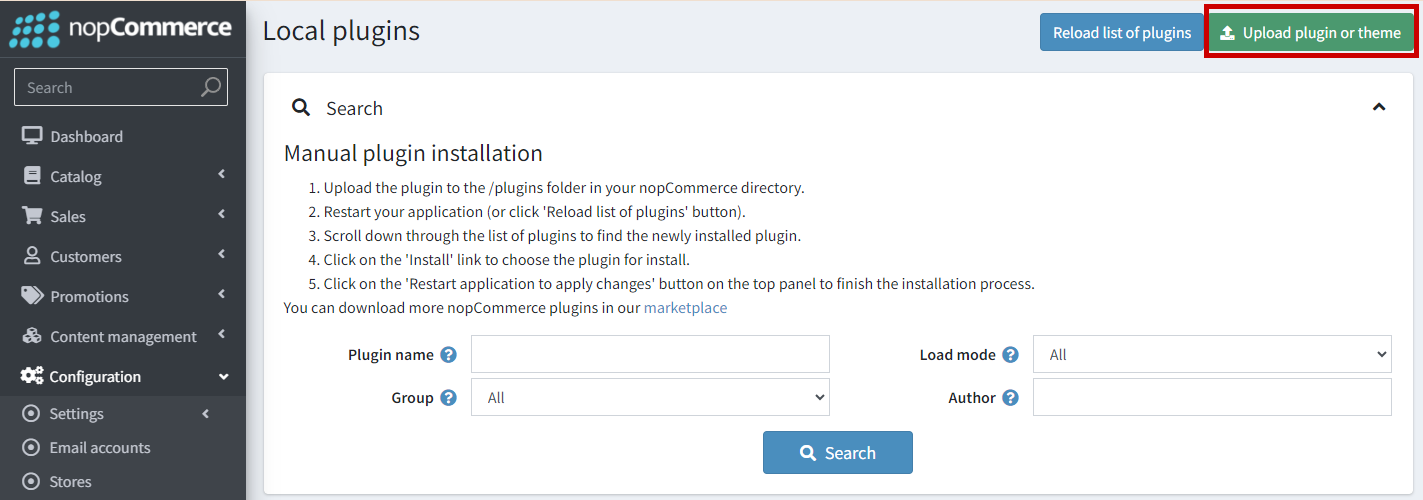
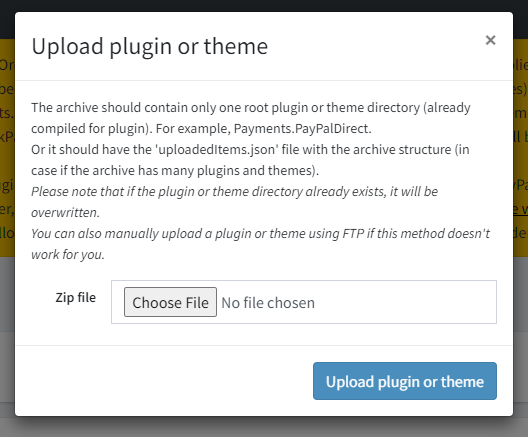
- Choose the file and select Upload plugin or theme and follow the upload module guide.
The plugin is now available in the list of installed plugins.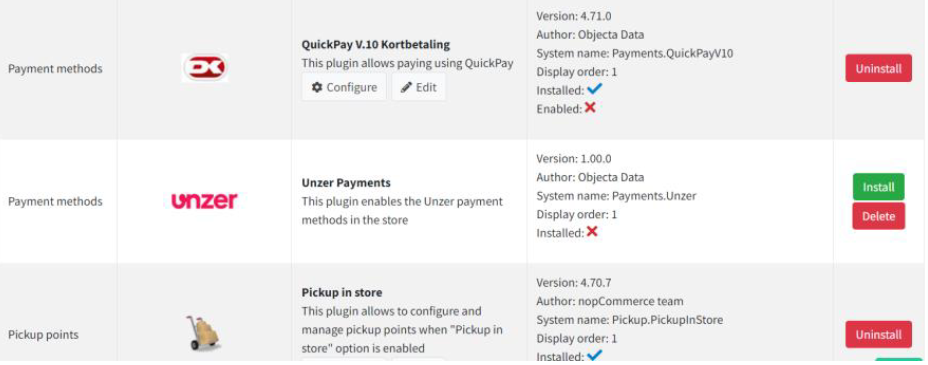
- Restart the application to complete the installation.
Step 4: Configure the module
- Go to Configuration > Payment methods > Configure.
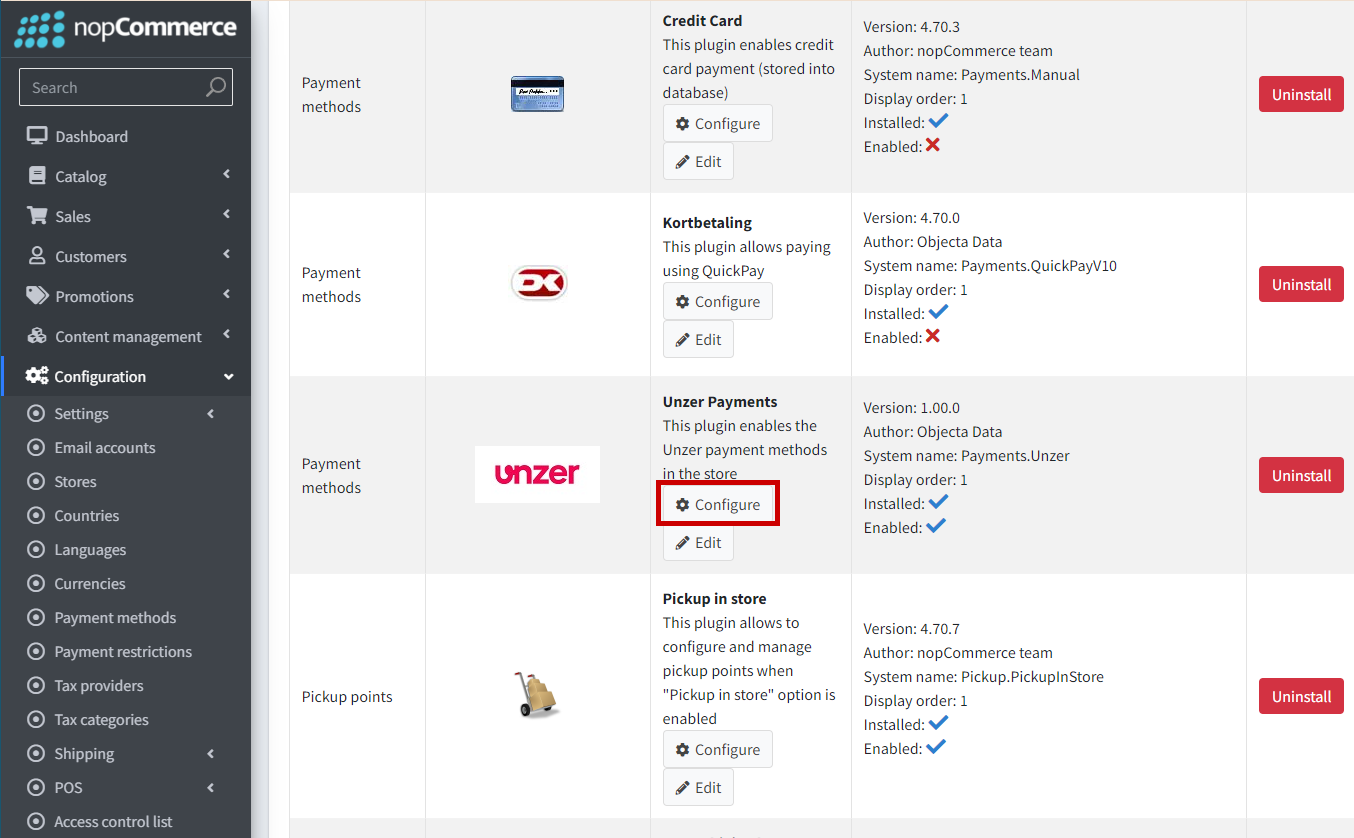
- Specify the Unzer API key, and add the private key.
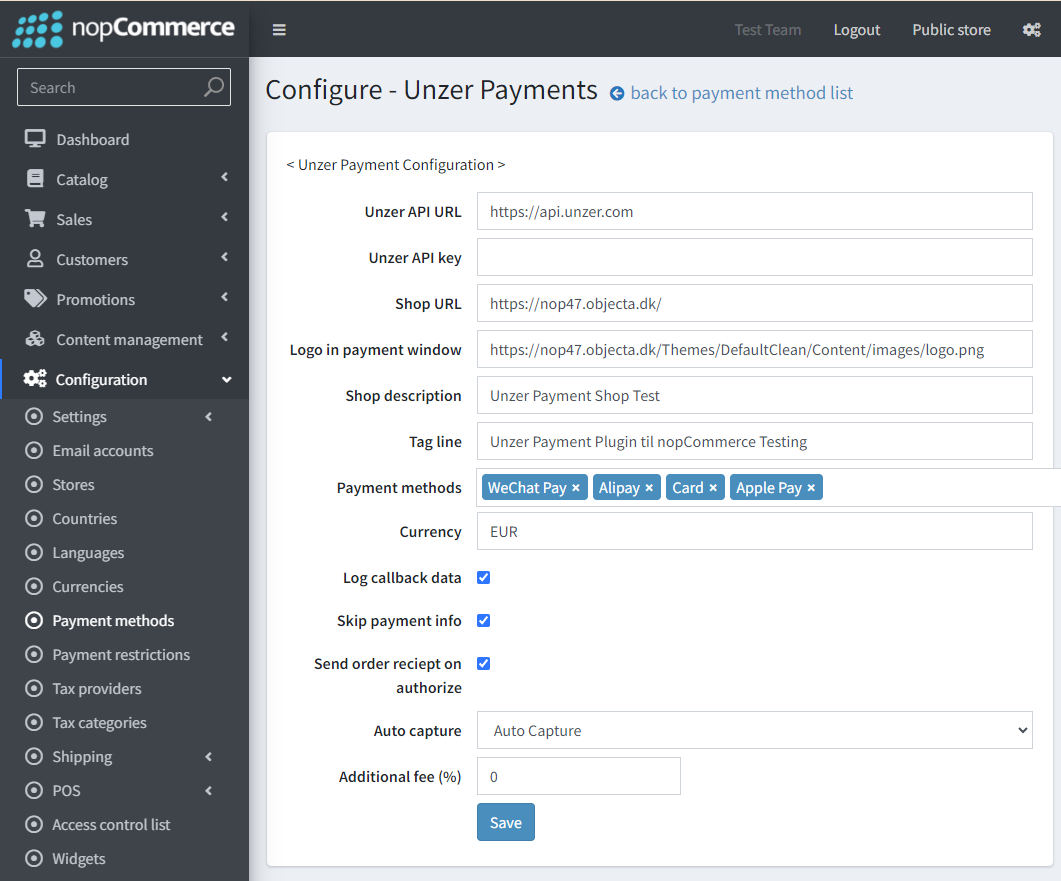
- Use the default Shop URL to avoid any problems with misconfiguration. The Shop URL is automatically set to the default shop/store url, and is used to direct the Unzer payment window and Unzer API back to this shop.
- (Optional) Specify the URL to display the logo in the payment window for the end customer.
- Specify the Shop description.
- Specify the Tag line for the payment window.
- Select the payment payment methods that you want to offer in your shop. You can also select All if you want to offer all the payment methods that are configured for your key pair.
- Specify the currencies that are available according to your key pair configuration.
- (Optional) To minimize the steps during check-out, select Skip payment info. If you don’t select this, you can display additional information or instruction to the customer about Unzer payment as the last step, before they are redirected to the payment window.
- Select Send order receipt on authorize if you want to send an order confirmation email to the customer only when the customer has authorized the payment.
- Specify if you want to implement One-step or Two-step payment flow.
- Select Auto capture option if you want to automatically capture the payment for a set of payment options, order types, and products.
- Select None if you want to authorize the payments and capture later.
- (Optional) Specify an additional optional fee percentage that you want to add to al the payments.
- Select Save.
Setting up the metadata
During the initial configuration a set of Unzer settings data is sent to Unzer, setting the following information:
- Metadata Plugin type: unzer/nopCommerce
- Metadata Shop type: nopCommerce
- Metadata Plugin ver.: 1.00.00
- Metadata Shop ver.: 4.70
Also, a set of pre-configured callback URLs is set as webhooks at Unzer:
- Authorize webhook:
https://<shop URL>/unzerpayment/callbackhandler - Charge:
https://<shop URL>/unzerpayment/callbackhandler
If the Unzer API Key is changed after the initial configurations, both new metadata and webhook has to be configured for the new Unzer API Key (account). This is done during configuration where the current and the new configuration is compared, and the Unzer settings is updated if required.
