Set up your payment methods
Set up the payment methods that you want to offer to your customers.
Before you begin
- Install the plugin
- To process payments with JTL 5, you’ve to set up the shop and Wawi.
Step 1: Configure your payment methods in the JTL Shop
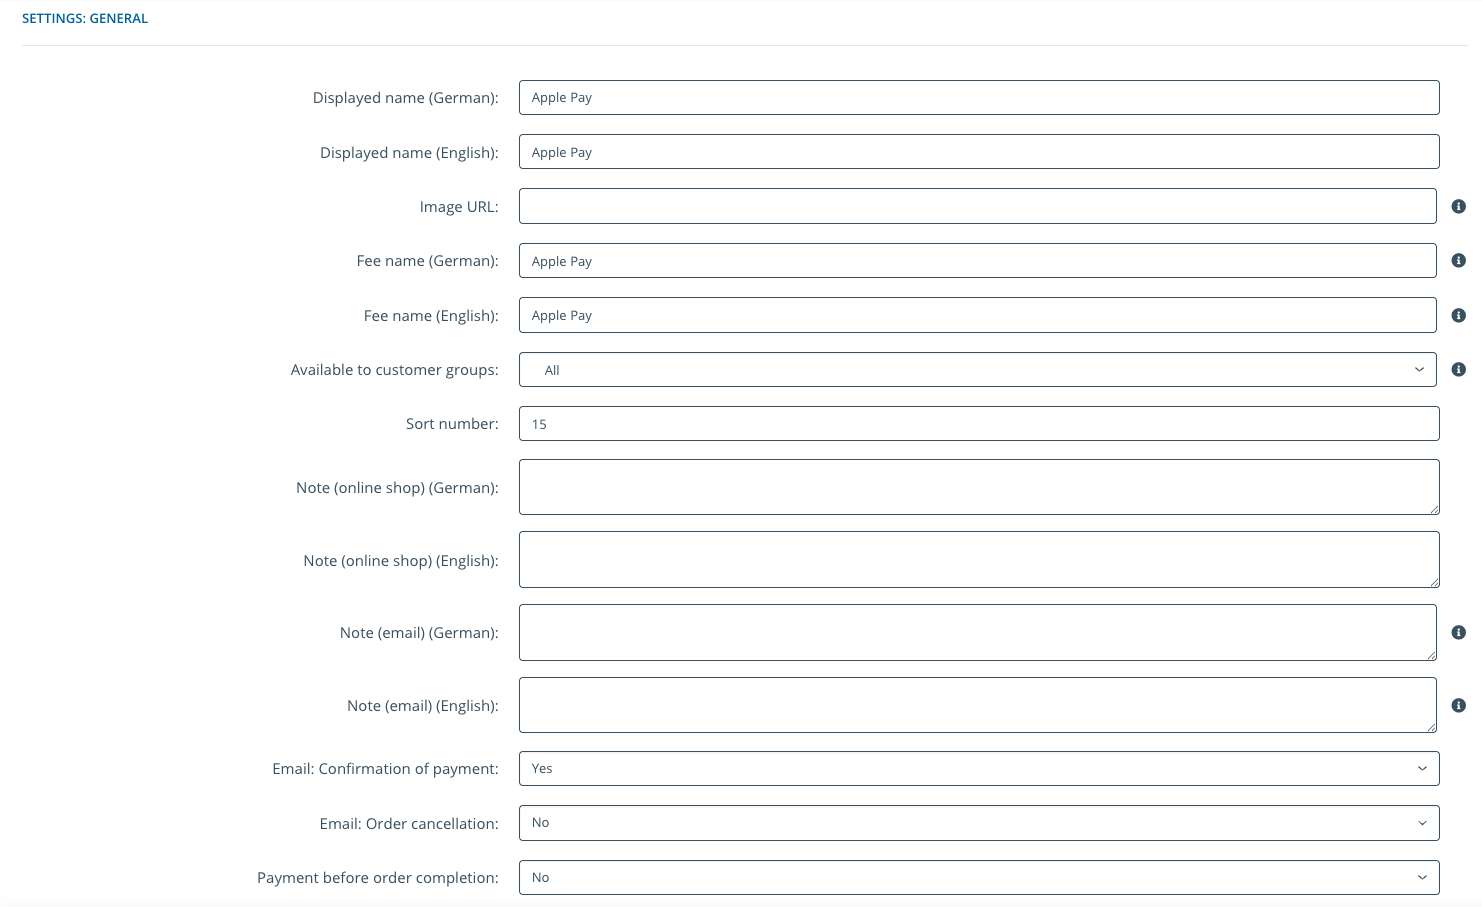
To configure each payment method, sign in to your admin account, and go to Administration > Zahlungen > Zahlungsarten.
For Unzer Flexipay Installment (Hire purchase), you must also enter the interest rate.
Field | Description |
---|---|
Effektiver Zinssatz (in %) | Specifies the effective interest rate of the monthly installment payments. The value is bound to your merchant configuration. Example: 5.99 |
Step 2: Assign shipping methods
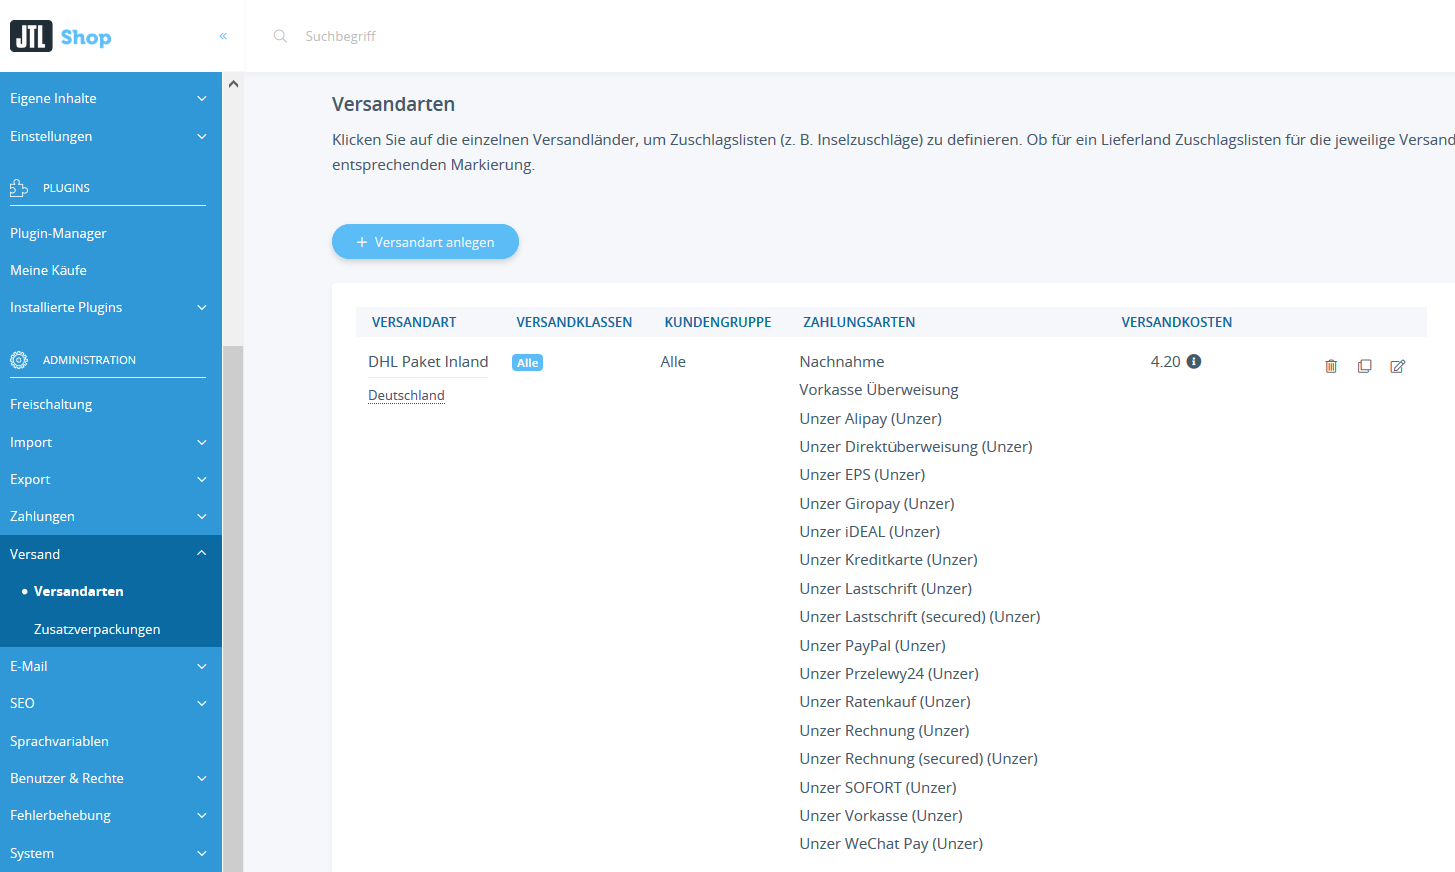
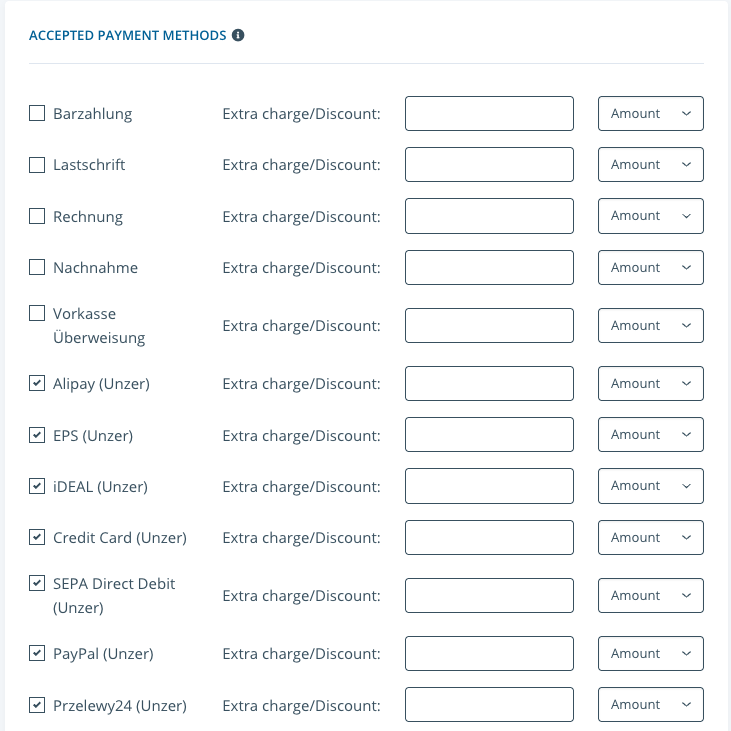
To assign the payment methods to the desired shipping methods/countries, go to Administration > Versand > Versandarten and update the details.
To check which payment methods are supported in each country, go to Payment methods.
Step 3: Set up JTL-Wawi for the plugin
To configure and set up your plugin,
1. Configure the payment methods in JTL Wawi
- Go to Zahlungen > Zahlungsarten.
- Create the payment methods, that you want to use, for example, Alipay.info
The payment methods must correspond to the Anzeigenamen in the JTL store. If you change the displayed name, also translate for other languages, and update here as well. - Select the Auslieferung vor Zahlungseingang möglich for the payment method Unzer Rechnung. This is necessary because the payment methods can be activated only during shipping.
2. Edit the invoice printing template
For invoices, you must update the invoice template. This is required to avoid unassigned payments or billing for the wrong accounts. The bank details to be used and the reason for payment are sent by the plugin as payment info and order attributes.
For invoices, insert the following DotLiquid code in the invoice print template.
Ihre Daten für die Überweisung:
Empfänger: {{ Vorgang.Attribute | Replace: '^.*unzer_account_holder=(.*?)(\||$).*','$1' }}
IBAN: {{ Vorgang.Attribute | Replace: '^.*unzer_iban=(.*?)(\||$).*','$1' }}
BIC: {{ Vorgang.Attribute | Replace: '^.*unzer_bic=(.*?)(\||$).*','$1' }}
Betrag: {{ Vorgang.Gesamtbetrag }}
Verwendungszweck: {{ Vorgang.Attribute | Replace: '^.*unzer_transaction_descriptor=(.*?)(\||$).*','$1' }}
Bitte beachten: Geben Sie bitte nur den Verwendungszweck an,
andernfalls können wir Ihre Zahlung nicht zuordnen.
Die Rechnung ist bei Erhalt und ohne Abzug fällig.
Bitte überweisen Sie den Gesamtbetrag schuldbefreiend auf das oben genannte Konto.
3. Create payment attributes
The payment information (if any) about transactions is updated by the plugin in the payment attributes. Create these attributes in Verkauf > Auftragsattribute so that you can also view them on the orders.
Field | Description |
---|---|
unzer_iban | The IBAN of the Unzer account to which the customer must transfer their money. |
unzer_bic | The BIC of the Unzer account to which the customer must transfer their money. |
unzer_transaction_descriptor | The purpose of use of Unzer, which the customer must specify on bank transfers. |
unzer_account_holder | The account holder of the Unzer account |
unzer_short_id | Technical ID of the transaction from Unzer, which can be used in the Insight Portal to find the transaction. |
unzer_payment_id | Payment ID from Unzer |
unzer_payment_type_id | Payment method ID |
unzer_rate_pdf_link | Link to the PDF with the information about the installment plan for the customer. |
unzer_rate_total_amount | Total amount of the installment |
unzer_rate_total_purchase_amount | Order amount of the installment |
unzer_rate_total_interest_amount | Interest amount of the installment |
4. Create workflows for (Deprecated) Unzer Invoice and (Deprecated) Unzer Invoice Secured
For the payment methods Unzer Rechnung and Unzer Ratenkauf, you need the invoice number to finalize the order during shipping. Because JTL-Wawi does not sent the invoice number in the online store comparison. You must set up a workflow for sending the invoice details. The invoice number is then sent to the plugin when an invoice is created.
- Go to Admin > JTL Workflows, and then Workflowverwaltung.
- Create a new workflow for the Auslösende Ereignis > Rechnung > Erstellt and specify the details.
Workflow conditions
The workflow must have the following conditions:
Make sure that the One condition met option is enabled for conditions.
Option | Comparison | Value |
---|---|---|
Auftrag.Zahlungsart.Name | equal | Unzer Rechnung |
Auftrag.Zahlungsart.Name | equal | Unzer Ratenkauf |
Workflow Actions
- Create a new Web Request (POST) action for the workflow with the following options:
Option Value URL https://{IHRE_SHOP_URL}/unzer-sync-workflow
Parameter attrs={{ Vorgang.Auftrag.Attribute }}&invoice_id={{ Vorgang.Rechnungsnummer }}&invoice_date={{ Datum.Gestartet }}
info
Replace {IHRE_SHOP_URL} with the URL where your online store can be reached. - Add the value by clicking the … button.
If you update the value in the input field and it is not grayed out, the variables are not replaced, but treated as normal text. So, the invoice number is not saved in the store when the workflow is executed and the invoice payment types cannot be finalized.
Set up Apple Payment payment method
Apple Pay v2 integration
Before you begin integrating Apple Pay payment method, please read the Apple Pay prerequisites for integration.
- In the shop back end, go to Payment methods > Unzer Apple Pay, and select Edit.
- Enable the payment payment method, and specify the booking mode based on your payment flow.
- Select Save.
(Deprecated) Apple Pay v1 integration (Only applicable for existing integrations)
- You require an Apple device to test the integration.
- For the payment type Apple Pay, make sure to add the necessary certificates as specified here.
- You need an Apple Developer account for the integration.
- When you change your key pair, you need to re-upload your Apple Pay Payment processing certificate.
- If you want to use Apple Pay for other web browsers, you must update to iOS 16 on your apple device. Go to the Apple Pay site for the latest updates and news.
Set up the payment method
- In the JTL 5 shop back end, set up the key pairs for the B2C currency combination.
- Go to Installed plug-ins > Solution 360 Unzer Payments > Apple Pay.
- Add the Merchant Identifier and the Merchant Domain.
- Download the CSR files for both the Payment Processing Certificate and Merchant Identity Certificate.
- Select Refresh to generate a new CSR file.
- In your Apple merchant account, upload both files to generate all the required certificates:
- Payment Processing Certificate
- Payment Processing Certificate ID
- Merchant Identity Certificate
- Merchant Identity Certificate ID
- Upload the certificates to the JTL 5 shop back end.
- Select Save.
- Select Activate Certificate.
Set up Unzer Invoice payment method
Set up Unzer Direct Debit payment method- For Direct Debit, ensure that only end customers with an invoice address from Germany and Austria can use this payment method.
- You require a unique key pair for this payment method, for example, a separate key pair for each combination B2C (EUR).
- Only B2C customer type is supported.
- Only Euro (EUR) is supported.
- Ensure that the payment method can only be used for the minimum and maximum amounts contractually agreed with Unzer.
- You can view the transactions in Unzer Insights.
- You must generate a shipment notification in the JTL-WAWI before you can charge the payment. This ensures that the insurance period is initiated.
- In the JTL 5 shop back end, you must also set up the key pairs for the B2C currency combination.
Set up the payment method
In the shop back end, go to Installed plug-ins > Solution 360 Unzer Payments > Key Pairs and then select Add.
Set up the payment method.
Field Description Private Key
Enter the private key that is available in Unzer Insights. Public Key
Enter the public key that is available in Unzer Insights. B2B
This check box should be checked only if the payment method and the entered key pairs supported the B2B customer type. Currency
Choose the currency that supported by the entered key pairs. Payment Method
Choose the payment method that should be added (In this case, Unzer Invoice should be selected) Choose the payment method and customer-currency combination that should be added (In this case, Unzer Invoice B2B for EUR currency)
Select Save.
Repeat the same steps to add other combinations according to your business case, for example, CHF, B2C & B2B.
Set up Unzer Installment payment method
- For Installment payment method, ensure that only end customers with an invoice address from Germany, Austria, or Switzerland can use this payment method.
- You require a unique key pair for each customer type and currency combination, for example a separate key pair for each combination B2C (CHF), B2C (EUR).
- Currently, only B2C customer type is supported.
- Currently only Euro (EUR) and Swiss Franc (CHF) currencies are supported.
- Ensure that the payment method can only be used for the minimum and maximum amounts contractually agreed with Unzer.
- You can view the transactions in Unzer Insights.
- You must generate a shipment notification in the JTL-WAWI before you can charge the payment. This ensures that the insurance period is initiated.
- In the JTL 5 shop back end, you must also set up the key pairs for the B2C currency combination.
Set up payment method
In the shop back end, go to Installed plug-ins > Solution 360 Unzer Payments > Key Pairs and then select Add.
Set up the payment method.
Field Description Private Key
Enter the private key that is available in Unzer Insights. Public Key
Enter the public key that is available in Unzer Insights. B2B
This check box should be checked only if the payment method and the entered key pairs supported the B2B customer type. For installment payment method, this check box should not be selected.Currency
Choose the currency that supported by the entered key pairs. Payment Method
Choose the payment method that should be added (In this case, Unzer Installment should be selected) Choose the payment method that should be added (In this case, Unzer Installment should be selected)
Select Save.
Repeat the same steps to add other combinations according to your business case, for example, CHF, B2C & B2B.
Set up Direct Debit Secured payment method
- For Direct Debit, ensure that only end customers with an invoice address from Germany and Austria can use this payment method.
- You require a unique key pair for this payment method.
- Currently, only B2C customer type is supported.
- Currently only Euro (EUR) currency is supported.
- Ensure that the payment method can only be used for the minimum and maximum amounts contractually agreed with Unzer.
- You must generate a shipment notification in the JTL-WAWI before you can charge the payment. This ensures that the insurance period is initiated.
Set up the payment method
In the shop back end, go to Installed plug-ins > Solution 360 Unzer Payments > Key Pairs and then select Add.
Set up the payment method.
Field Description Private Key
Enter the private key that is available in Unzer Insights. Public Key
Enter the public key that is available in Unzer Insights. B2B
This check box should be checked only if the payment method and the entered key pairs supported the B2B customer type. info
For Direct Debit payment method, this check box should not be selected.Currency
Choose the currency that supported by the entered key pairs. info
For Direct Debit payment method, this check box should not be selected.Payment Method
Choose the payment method that should be added (In this case, Unzer Direct Debit should be selected) Choose the payment method that should be added (In this case, Unzer Direct Debit should be selected)
Select Save.
Set up Google Pay payment method
To learn more about the Google Pay integration, go to Google Pay: Overview.
You must also set up the gatewayMerchantId
for Google Pay. Go to Google Pay integration for more details.
- In the shop back end, go to Payment methods > Unzer Google Pay, and select Edit.
- Select the Booking Mode.
- Specify the details, add the Gateway Merchant ID, Merchant ID, and Merchant Name.
- Select Save.
Next steps
Learn how to handle transactions Manage transactions