Install the plugin
Learn how to install and configure the plugin.
Before you begin
Before installing the plugin, make sure that your shop meets the technical requirements as specified by Ecwid.
Note that third-party plugins and templates can affect the various functionalities of the Unzer plugin. So, we recommend that before using or updating them and after each update, you should check if there are any changes on the test system.
Step 1: Generate your API keys
Request test and live key pairs for your Unzer merchant account.
Step 2: Install the plugin
- Go to the install link.
- Follow the steps for installing the plugin.
Once the plugin is installed, you can view the plugin in the shop backend.
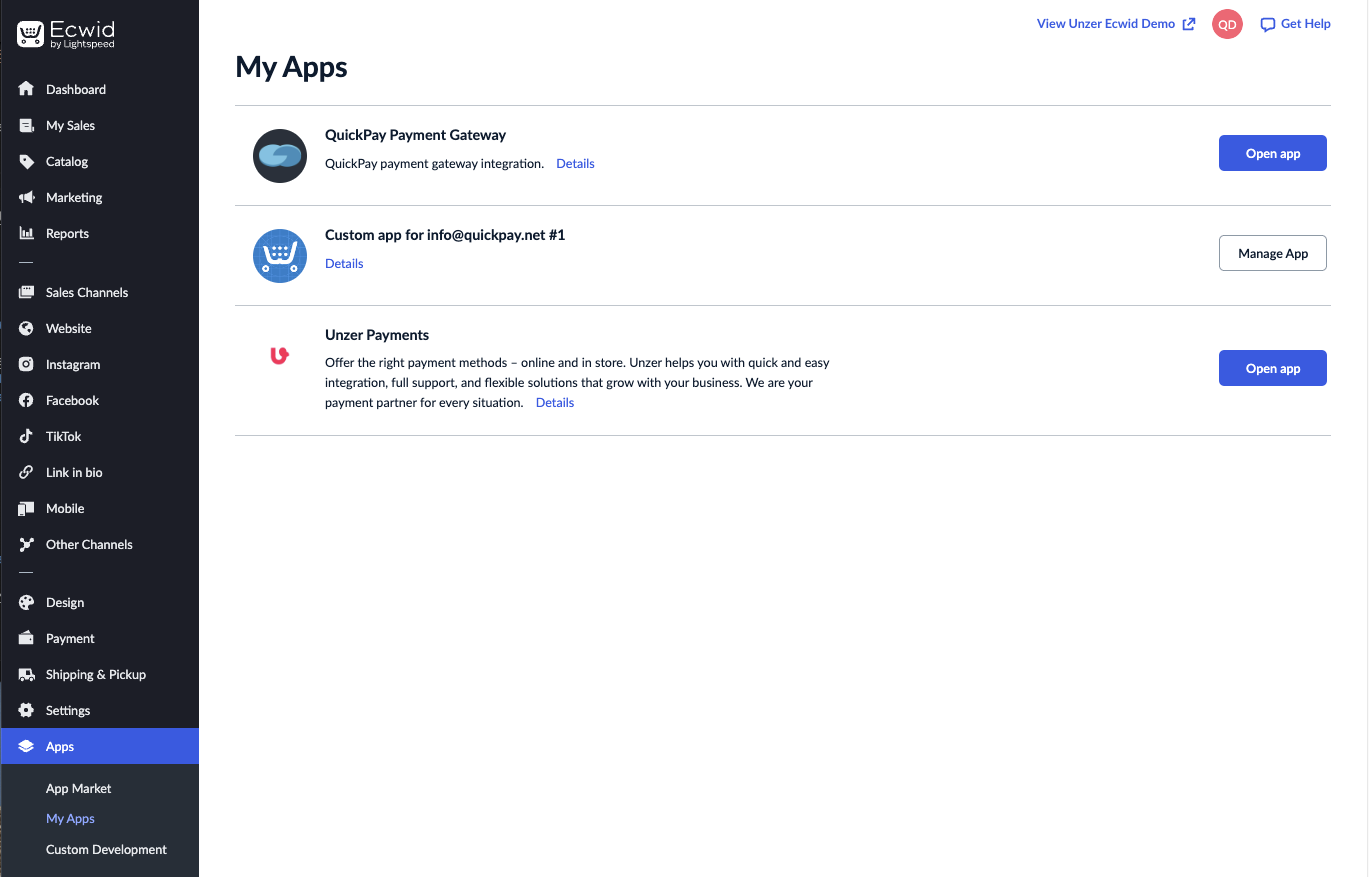
Go to Apps > My Apps.

Step 3: Configure the module
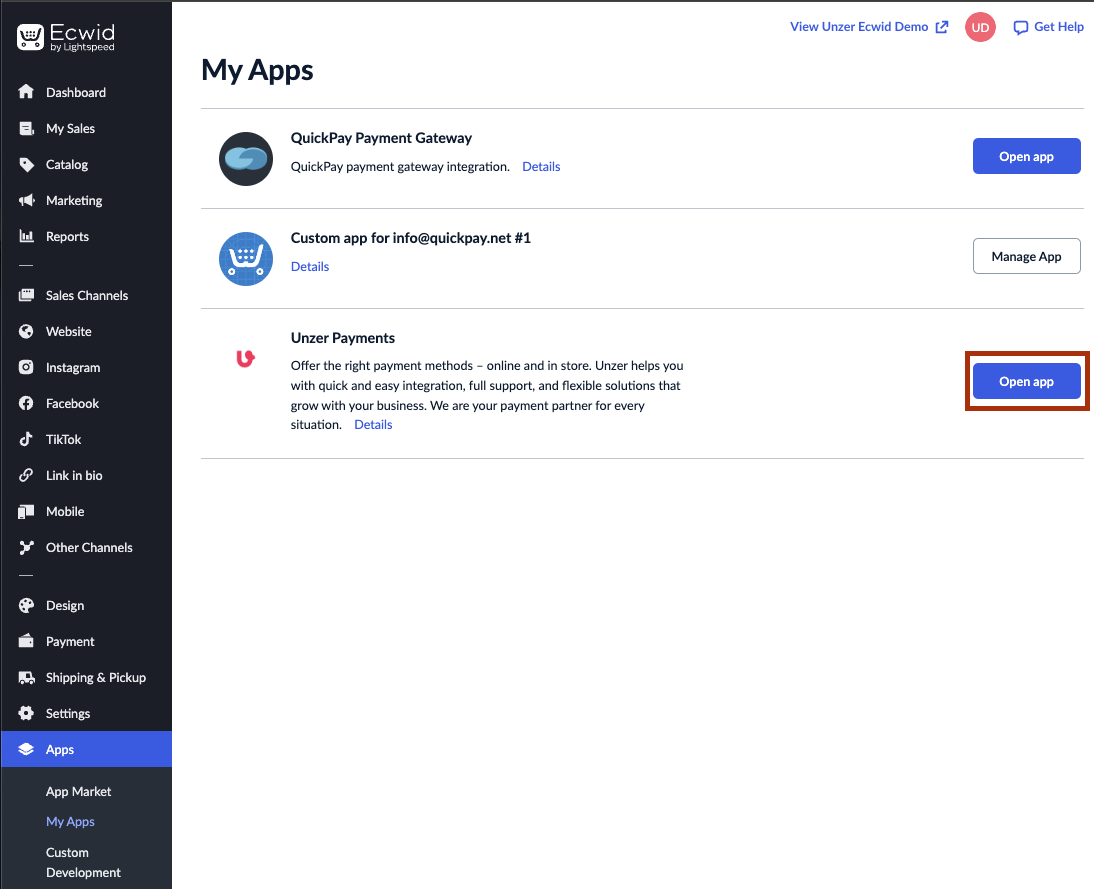
Go to Apps > My apps and select Open app for the Unzer plugin. Alternatively, you can also go to Payment and then select Unzer Payments.

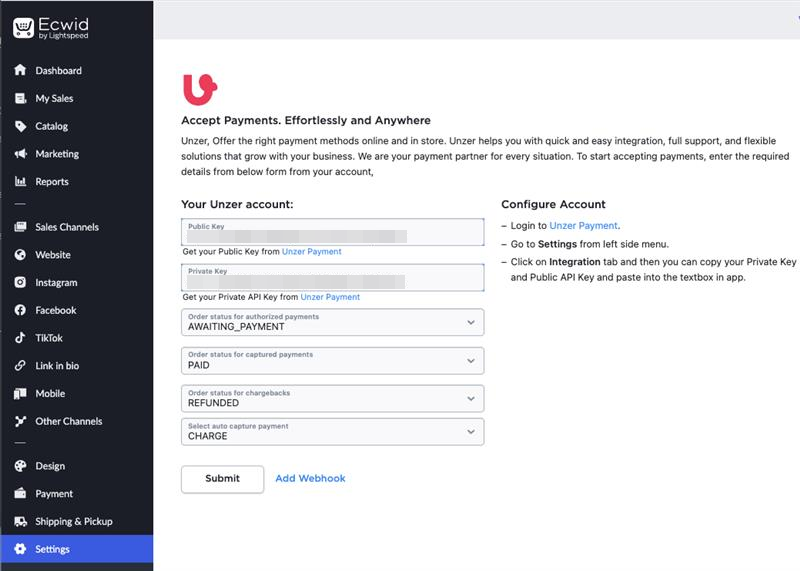
Specify the keypairs and other details for the plugin.

Field Description Public Key Specify the public key. Private Key Specify the private key. Order status for authorized payments Select the order status for that you want for authorized payments. Order status for captured payments Select the order status for the captured payments. Order status for chargebacks Select the order status for chargebacks. Select auto capture payment Select the booking mode for payments. Note that if you select AUTHORIZE, only payment methods that support booking mode authorize are available in the checkout. If you select CHARGE, all the payment methods that support direct charge are also available in the checkout. Select Submit.
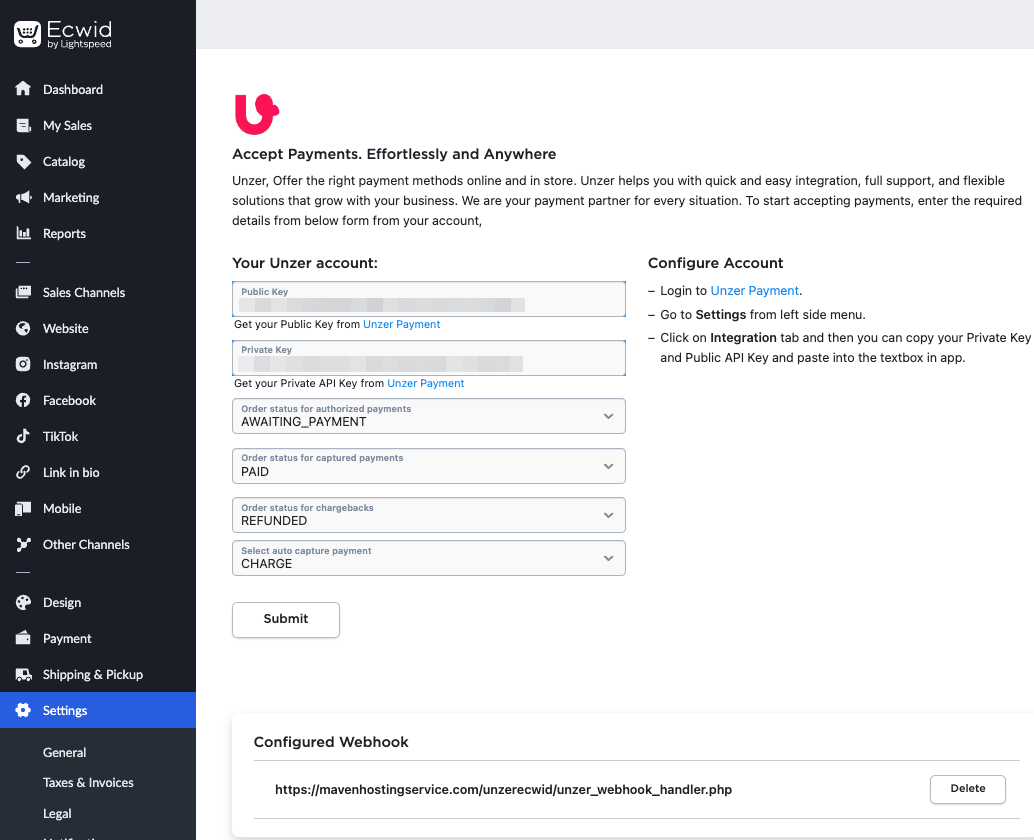
Select Add Webhook.
You can view the webhooks in the Configured Webhooks section.

